

Looking to convert CDA to MP3? Converting audio files can be a daunting task, especially if you don’t have the right tools. If you’re in the market for an easy and efficient way to convert CDA to MP3, look no further! This article will provide you with a step-by-step guide on how to convert CDA to MP3 quickly and easily with the help of free online tools. Read on to find out how you can convert your CDA files to MP3 in just a few clicks!
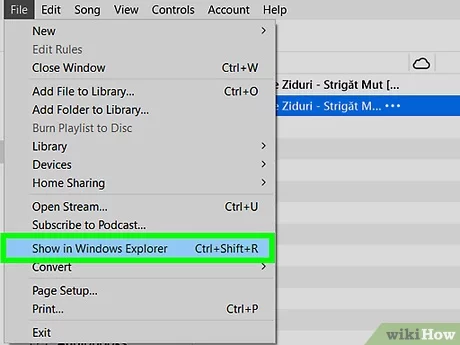
Download and Install a CDA to MP3 Converter: The first step in converting CDA to MP3 is downloading and installing a suitable converter software
Finding the right software to convert CDA to MP3 can be tricky, but the good news is that there are many excellent programs available that are safe, reliable and easy to use. To get started, simply search for a CDA to MP3 converter and download a trusted program to your computer. Once the software is installed, you can begin the conversion process.
There are many options available and it is important to find one that is compatible with your device and offers the features you need
Choosing the right CDA to MP3 converter is essential to ensure you get the most out of your audio files. With so many options available, it can be difficult to find one that is compatible with your device and offers the features you need. To make the decision easier, do your research and find a converter that works for you.
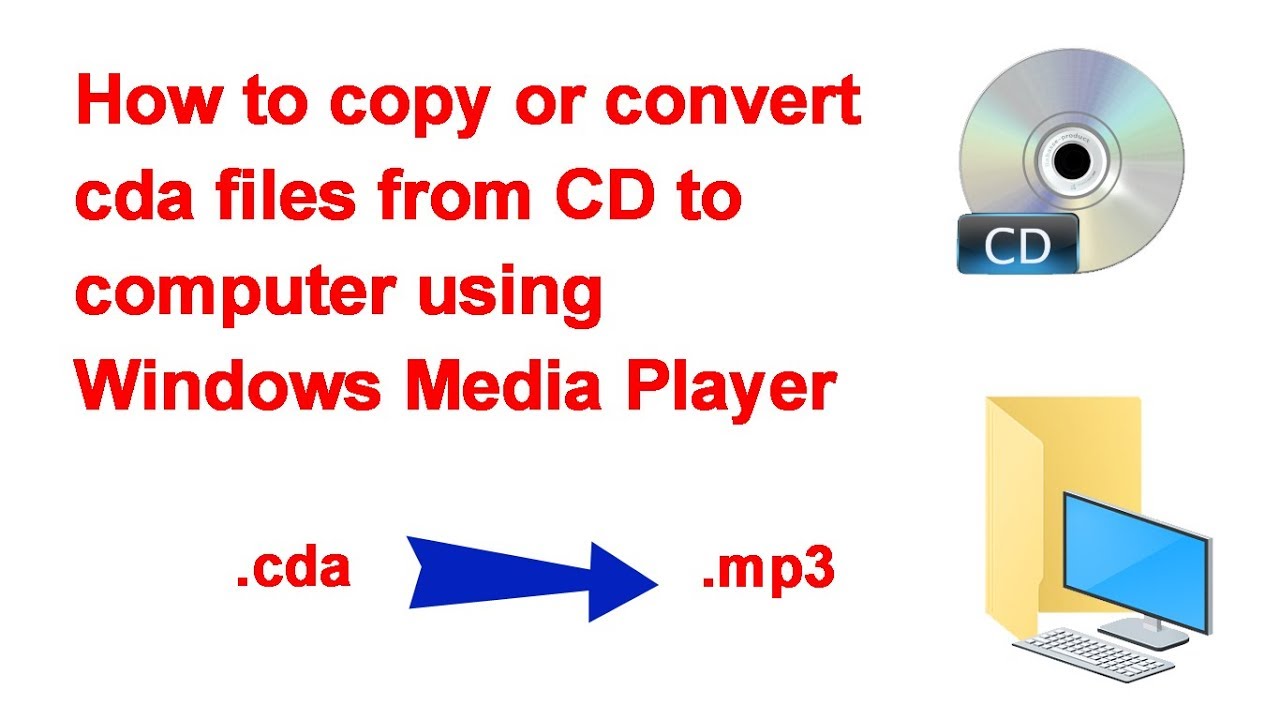
This article provides an overview of how to convert CDA files to MP3 format, including the best software to use and step-by-step instructions for the conversion process. With the right software, users can quickly and easily convert their CDA files to MP3 format for easy listening and sharing.
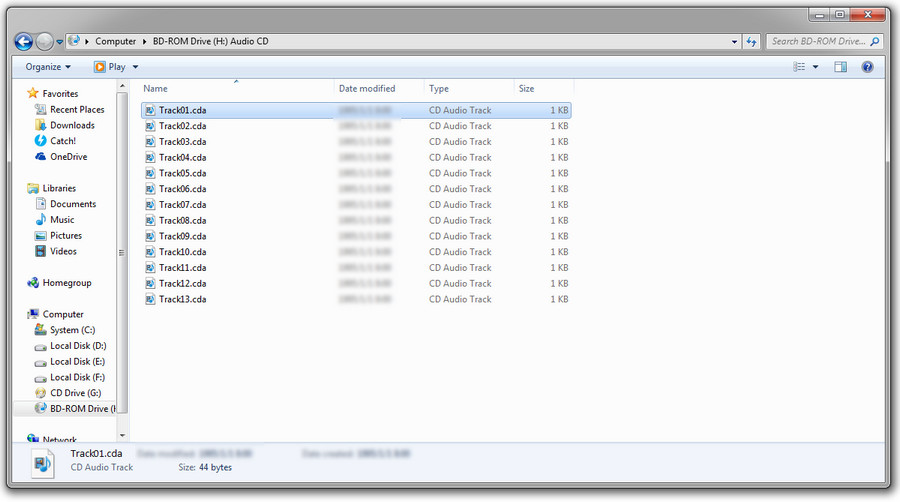
Import CDA Files: Once the software is installed, you will need to import the CDA files you want to convert
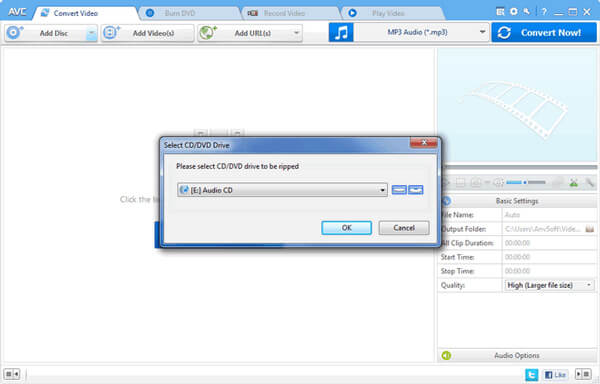
Importing CDA files to a computer is a straightforward process. All you need to do is open the relevant software and select the CDA files you want to convert. The program will then scan your computer for the files and allow you to select them for conversion. Once selected, the program will quickly and efficiently convert the CDA files to MP3 format.
This can be done by selecting the “Add Files” or “Import” button on the converter
Using the converter’s “Add Files” or “Import” button, you can easily convert your CDA files to MP3, allowing you to enjoy high-quality audio on a variety of devices. Converting CDA to MP3 is a simple and straightforward process that can be completed in just a few clicks, making it easy to access your favorite music on any device.
This blog post outlines how to convert CDA files to MP3, one of the most popular music file formats. It explains the various methods available to do this and offers tips to ensure a smooth and successful conversion. Additionally, this guide provides detailed instructions on how to use the best tools to convert CDA to MP3 quickly and easily. Learn how to convert CDA files to MP3 with this comprehensive guide.
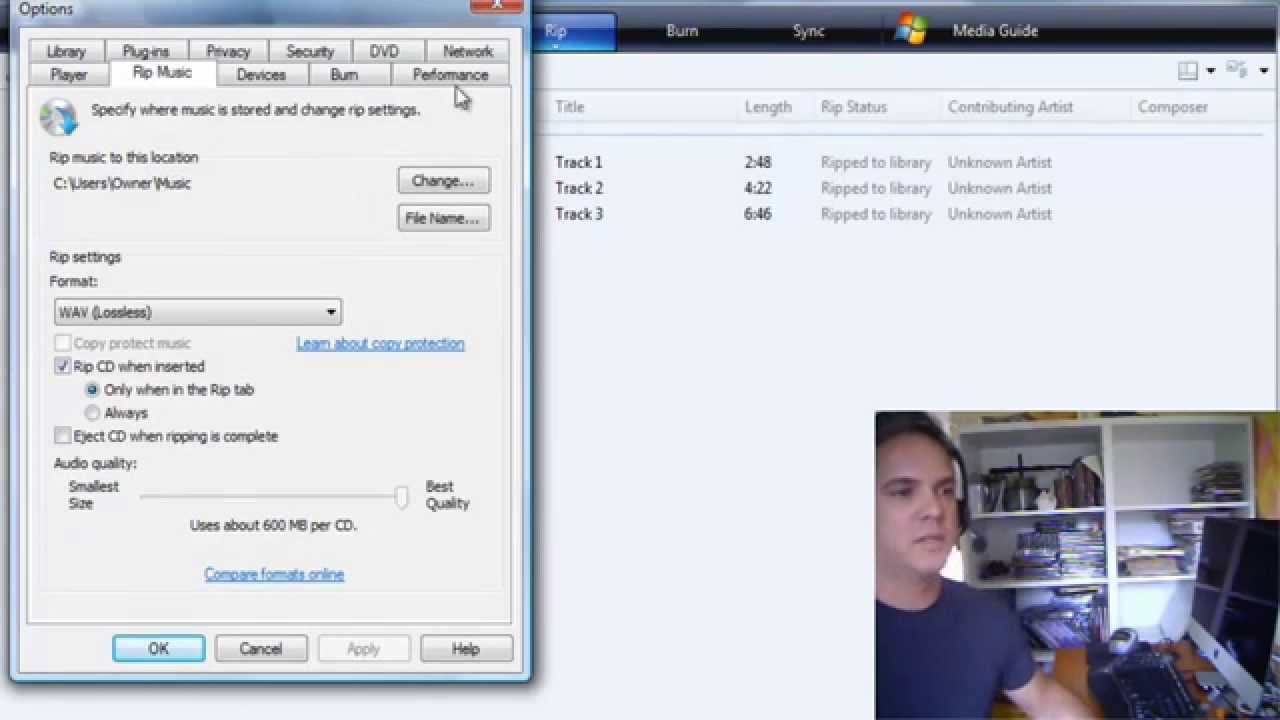
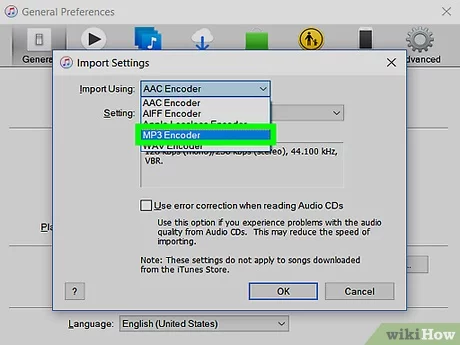
Select Output Format: Once the CDA files have been imported, you will need to select the output format
The next step in converting CDA to MP3 is to select the output format. From the dropdown menu, you can choose the desired format to convert the files to, such as MP3, WAV, WMA, AAC, FLAC, OGG, and more. Once you have selected the output format, you can then proceed to convert the CDA files to MP3.
Generally, MP3 is the most popular and convenient format for audio files
.MP3 is the most commonly used and accessible audio format, allowing users to easily convert their audio files from CDA to MP3. Converting CDA files to MP3 can be done in a few simple steps, making it a great choice for those who want to listen to their audio files on multiple devices.
Writing an SEO optimized sentence of blog content to expand on the blog sections can be done by using keywords that relate to converting CDA to MP3. For example, “If you’re looking for an easy way to convert CDA files to MP3, our blog will show you how to quickly and efficiently convert CDA to MP3 in just a few simple steps.”
Choose Destination Folder: The next step is to choose the destination folder for the converted files

Once you have chosen the file you want to convert, the next step is to select a destination folder for your converted MP3 files. This destination folder can be located on your computer, external storage device, or cloud storage service. It’s important to choose a destination folder that is easily accessible and can be easily located when you need to access your converted files.
This can be done either by selecting the browse button or by typing in the location of the folder you wish to save the converted files in
To ensure that your converted files are saved in the desired location, you can easily choose the browse button or manually type in the file path to the desired folder. This simple step will help you keep your CDA to MP3 conversions organized and easily accessible.
This article provides an easy guide to converting CDA files to MP3 format, outlining the steps needed to quickly and efficiently produce a high-quality MP3 version of your favorite audio tracks. Whether you’re looking to share your music with friends or create a podcast, this tutorial will show you how to turn CDA files into MP3s in no time.
Start Conversion: After all the settings have been set up, you can now start the conversion process by clicking the “Convert” button
Once you have configured your settings, the next step is to click the “Convert” button to begin the process of converting CDA to MP3. This process is fast, easy, and efficient, allowing you to quickly and easily convert your audio files so you can enjoy them in the desired format.
Depending on the size of the CDA files, this process can take
The length of time it will take to convert CDA to MP3 depends on the size of the files; however, with the right software, it can be accomplished quickly and efficiently.

GIPHY App Key not set. Please check settings