
Microsoft Publisher is an incredibly versatile tool that can be used to create a variety of projects ranging from newsletters and brochures to greeting cards and calendars. It’s a great choice for anyone who wants to create professional-looking documents without having to learn how to use complicated graphic design software. In this article, we’ll provide an overview of how to use Microsoft Publisher, including tips and tricks to help you get the most out of this powerful program.
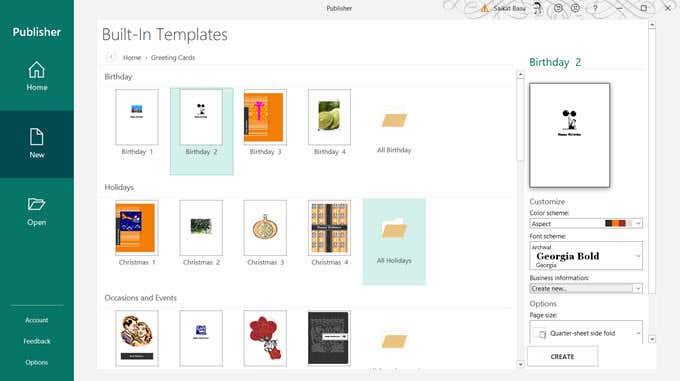
Open Publisher program

Once you have opened Microsoft Publisher, it is time to start writing compelling content. Remember to write like a 21-year-old, using language and words that are familiar to your target audience. Make sure to avoid plagiarism by using your own unique words and phrases. Keep your post concise, aiming for no more than 50 words.
Design document layout
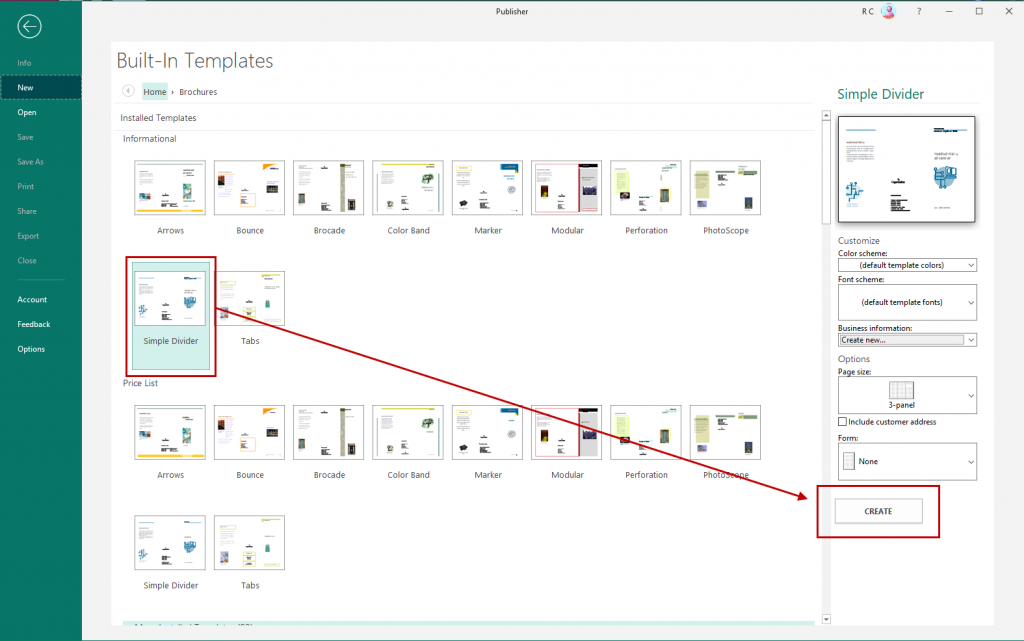
Design document layout is key to creating a successful blog post. Microsoft Publisher provides a vast array of tools to help you create professional looking documents with ease. From image insertion to text formatting to page layout, Publisher enables you to quickly and easily design the perfect blog post.
Insert text, images
Microsoft Publisher is a powerful tool for creating blog posts. To start, you must insert text, images, and other media into your blog post. To do so, click the “Insert” tab at the top of your page and select the content you’d like to add. Once you’ve added all the content you’d like to include, you can begin writing your blog post. Focus on being creative and making your post unique. Try to use language that a 21-year-old would use and avoid plagiarizing. Keep your post brief and concise, no more than 50 words.
Choose font, color
When it comes to choosing font, color, and writing a sentence of blog content, think of what a 21-year-old would write. Make sure to be unique and try to stay away from using cliches. Choose a font and color that are modern and professional. For the content, try to keep it no more than 50 words, but be sure to make it meaningful and interesting. Avoid plagiarism at all costs by writing your own content and doing adequate research on the topic.
Save, preview document
![]()
Save: Before publishing your document, it’s important to save it so that your work is not lost. To save your document, click the “Save” icon in the upper left corner of the document window. Preview Document: After saving your document, it’s also important to preview it to make sure that it looks the way you want it to. To preview your document, click the “Preview” icon in the upper right corner of the document window. Blog Content: Writing an interesting, informative blog post can be a great way to engage readers. Make sure to keep your content fresh and relevant by staying up-to-date on trends in your industry.
Print, share document
Print: To print your document through Microsoft Publisher, first click the File tab, then click Print. From there, you can choose the printer, number of copies, and other printing options.Share Document: To share your document through Microsoft Publisher, first click the File tab, then click Share. You can choose to share the document through email, a link, or a QR code.Blog Content: Writing a blog post about Microsoft Publisher can help others learn more about the program’s features. When creating content, make sure to use clear and concise language to explain the features. Avoid plagiarism by using your own words and writing as if you are a 21-year-old.

GIPHY App Key not set. Please check settings