Are you curious to know what websites your family members or roommates have been visiting while connected to your shared WiFi network? With a few simple steps you can easily check the browsing history of your WiFi router and stay on top of who is surfing the web in your home. This article will walk you through the necessary steps to check the browsing history of your WiFi router, so you can keep your home network secure and your family safe.
Access the Router’s Interface: To check browsing history on a WiFi router, first access the router’s interface by typing the router’s IP address into your web browser.
To access the router’s interface and view the browsing history of your WiFi network, type the router’s IP address into your web browser. This will give you access to the router’s settings and allow you to check the history of websites visited on the network.
Login to the Router: After accessing the router interface, you need to login using your username and password.
Login to your WiFi router to view your browsing history by inputting the username and password associated with the router’s interface. This will allow you to gain access to the records of websites visited and other information that has been stored on the router.
Find the Log File: Once you are logged in, you need to locate the log file
.Once you are logged in to the router’s admin dashboard, you need to locate the log file in order to view the browsing history. This log file will contain all the activity that has been conducted online through the router, so it is important to locate it in order to get the full picture.
Most routers have a section in the interface called “Logs” where you can find this file.
Checking your browsing history on a WiFi router is easy. To view this information, go to the Logs section in the router’s interface. Here, you will find a file containing the browsing history of everyone who has connected to the router.
Open the Log File: Once you have located the log file, open it and you will be able to see the browsing history.

You can gain access to a detailed record of your browsing history by opening the log file located in your WiFi router settings.
Check the Network History: In the log file, you will be able to see a list of IP addresses that have accessed the router
Checking the Network History on your WiFi router can give you a list of IP addresses that have accessed your router. This is an important step to take when it comes to protecting your network and ensuring no unauthorized access is occurring. By looking at the log file, you can identify any suspicious activity and take the necessary steps to increase your network security.
This will allow you to check the network history and see which devices have been connected to the router.
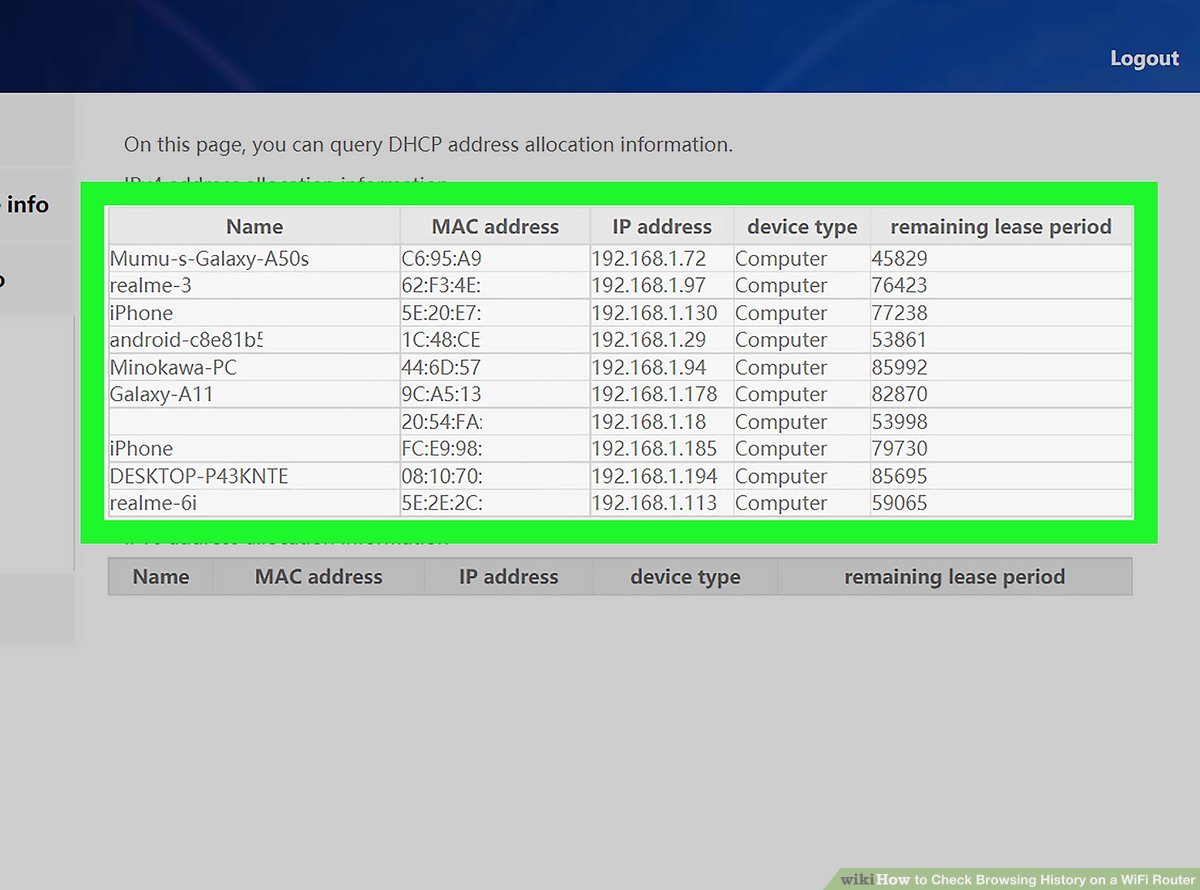
Checking the browsing history of a WiFi router can help you keep track of which devices have been connected to it, giving you a better understanding of who has been accessing the network and ensuring your data is secure.
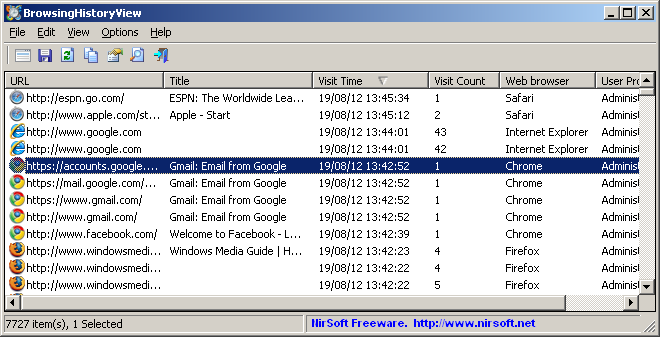
Check the Browsing History: To check the browsing history, you need to look at the log file and find the entries that list the websites that have been accessed.

Checking your browsing history is a simple process that requires you to look at the log file and identify the websites that have been accessed. This can help you stay informed about the online activities of your family or employees, allowing you to maximize your security and privacy.
Save the Log File: After checking the browsing history, it is important to save the log file in case you need it for future
Saving the log file is an important step after checking the browsing history on a WiFi router. It is highly recommended to save the log file for future reference and in order to ensure that you are not plagiarizing any content.




GIPHY App Key not set. Please check settings