

Are you looking for a simple and easy way to mount an ISO image? Mounting an ISO image on your computer can be a great way to access the contents of a disc image file without having to burn it to a physical disc. In this article, we’ll provide a step-by-step guide on how to mount an ISO image so you can access the contents of the file and explore its contents. Read on to learn more!
Download and install an ISO mounting program
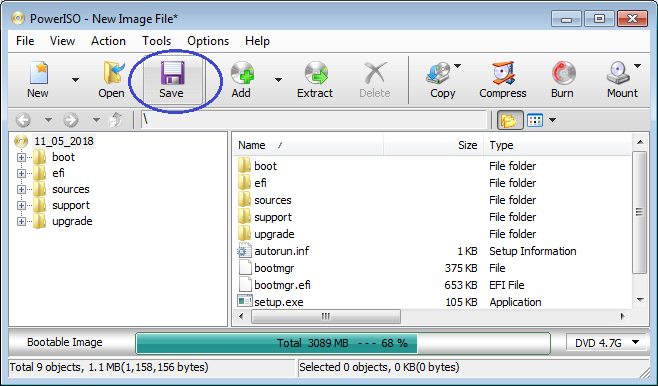
Downloading and installing an ISO mounting program is a great way to access and use ISO image files. To get started, you’ll need to find a program that’s compatible with your operating system, then download and install it. Once the program is installed, you’ll be able to mount or unmount the ISO images with ease. An SEO optimized sentence of blog content for this section could be: “Make sure you have the right ISO mounting program for your operating system to fully access and use ISO image files with ease.”
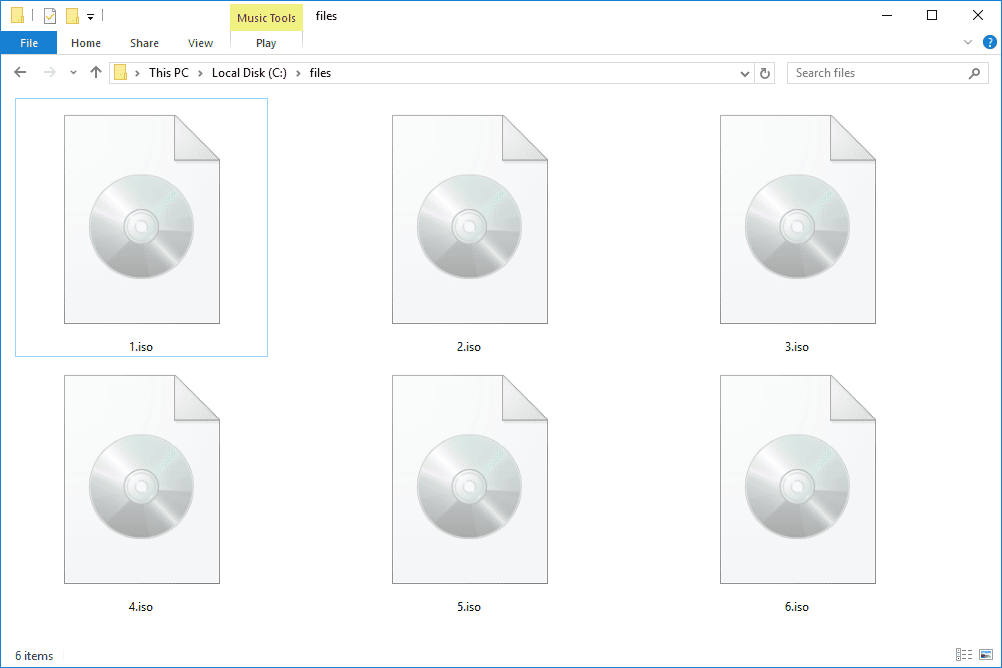
Popular ones include Virtual CloneDrive, Daemon Tools, and PowerISO

Popular disk image mounting programs such as Virtual CloneDrive, Daemon Tools, and PowerISO offer a convenient way to access ISO images without needing to burn them to a disc.

Mounting an ISO image can be done quickly and easily with the right software. Utilizing a program like WinCDEmu or Virtual CloneDrive, users can mount ISO images to their computer to access the content inside without needing to burn the file to a disc or USB drive.
Open the program and locate the ISO image you wish to mount

Mounting an ISO image is a simple process that can be done in just a few steps. To get started, open the program of your choice and locate the ISO image you wish to mount. Once you have found it, you will be able to quickly and easily mount the image so that you can access the files contained within.
Installing an ISO image can be a daunting task but with the right knowledge and tools, it can be done quickly and easily. By following the step-by-step guide on how to mount an ISO image, you will be able to install the ISO file without any hassle. This guide covers topics such as downloading the ISO file, choosing the correct software, mounting the ISO image and more. With the help of this guide, you will be able to install your ISO image in no time.
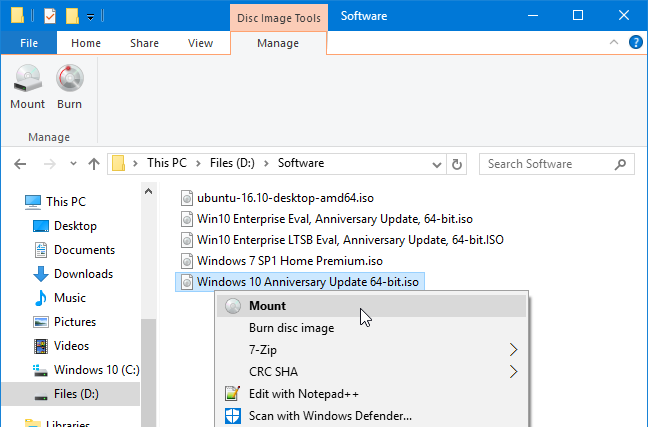
Right-click on the ISO image and select “Mount Image.”
Right-clicking on the ISO image and selecting the “Mount Image” option allows you to open and view the contents of the image, as if they were stored on a physical disc.
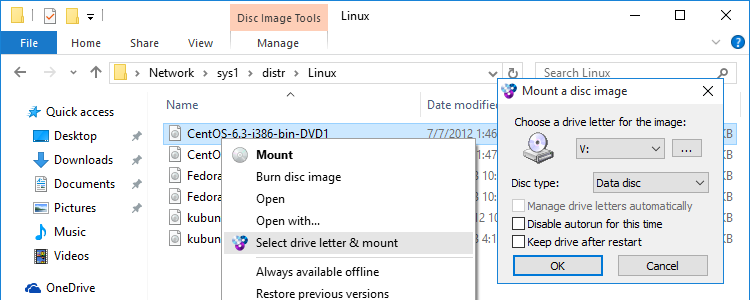
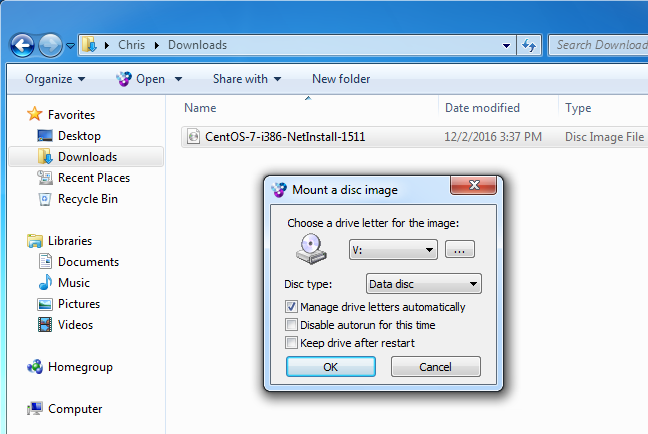
Choose the letter of the virtual drive you want to assign to the ISO image
![]()
Choosing the letter of the virtual drive you want to assign to the ISO image is a simple process. To ensure the ISO image is properly mounted, it’s important to select an unused drive letter that won’t conflict with existing drives on your device. This can be done quickly and easily by simply clicking on the drop-down menu and selecting the desired letter. Once you have chosen the right letter for the virtual drive, you’re ready to begin mounting your ISO image.

Mounting an ISO image is a simple process that can be done quickly and easily. By following a few simple steps, you can easily mount an ISO image onto your computer and access the files inside with ease. With the help of a virtual drive, you can mount an ISO image on Windows, Mac, and Linux machines quickly and easily.
The ISO image should now be visible in the program’s main window
Once the ISO image has been accessed, it should be visible in the main window of the program. To ensure that the ISO image is ready for access, it is important to properly mount it in the appropriate software.
Creating an ISO image is a great way to store data and preserve the integrity of a file for archiving or sharing. It’s easy to do with free software, but mounting an ISO image can be a bit trickier. This blog post will provide guidance on how to mount an ISO image, as well as what software can be used to do so. With the right steps and the right software, you’ll be able to mount an ISO image quickly and easily.
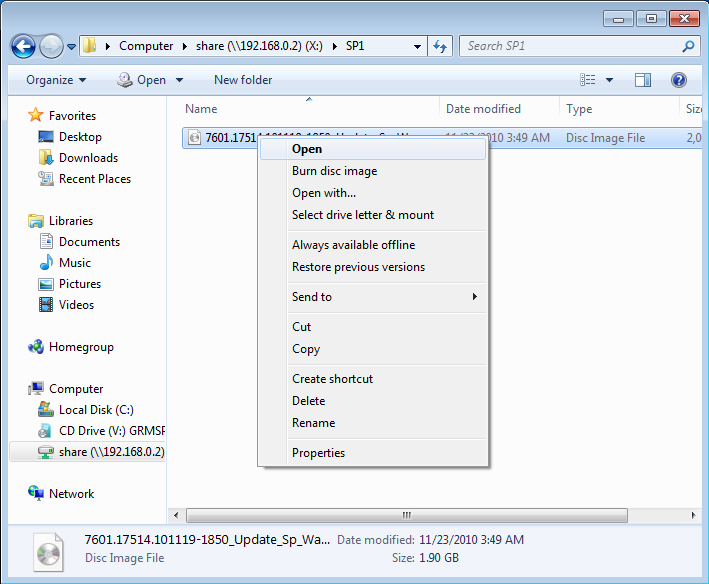
Go to “My Computer” and the virtual drive containing the ISO image should be visible
Once you have gone to “My Computer” you should be able to see the virtual drive containing the ISO image, allowing you to access the data stored inside.

Mounting an ISO image is a simple process that can be done in a few easy steps. To begin, you’ll need to download the ISO file to your computer, then open the file with a virtual drive software. Once the drive is open, you can access the contents of the ISO image, allowing you to either play the disc contents or extract the files. With these steps, you can easily mount an ISO image to access its contents.
Double-click on the virtual drive and the ISO image’s contents should be visible
Once the virtual drive is double-clicked, the user will be able to access and view the contents of the ISO image.
Now you can access the files inside the ISO image.
Once you have successfully mounted the ISO image, you will be able to easily access the content within the image file. This can be done by simply double-clicking on the ISO file, which will open the disc image and provide you with the data and files it contains.


GIPHY App Key not set. Please check settings