
If your computer is running slow or having other issues, re-imaging it may be the best solution to get it working like new again. Re-imaging is a great way to restore your computer to its original factory settings and erase any unwanted data or viruses. In this article, we’ll walk you through the steps on how to reimage a computer and get it running at its best again.
Back up important data and files: Before you start the reimage process, make sure to back up important data and files

Backing up your important documents and files is a crucial step before beginning the reimage process. To ensure your data is safe, it is essential to create a backup of all your documents, photos, music, and more, so that you can access them should anything go wrong during the reimage process.
This includes documents, photos, music, emails, and any other important data
Backing up all your important documents, photos, music, emails and other data is essential before beginning the process of re-imaging your computer. Make sure all of your important information is safely stored in a secure location so it can be restored after the re-imaging process.
You can back up your data to a USB drive, external hard drive, or cloud storage.
,Backing up your data is essential before re-imaging your computer. To ensure your data is safe, consider storing it on a USB drive, external hard drive, or cloud storage. Protect your files and memories by taking advantage of these easy-to-use storage solutions.
Download the reimage software: Find and download the reimage software you need

Finding the right reimage software can be difficult. Here, we provide tips on how to locate the best reimage software that meets your needs and how to properly download it.
Different computer brands have different software
Different computer brands, such as Dell, HP, and Apple, require their own specific software for the reimage process, so it is important to research which software is required in order to successfully reimage the computer.
Make sure you are downloading the correct software for your computer.
When re-imaging a computer, it’s important to ensure that you are downloading the correct software for your device. Failing to do so may cause the computer to become unstable or even inoperable. To avoid any potential issues, make sure to do your research and confirm that the software you are downloading is compatible with your system.
Create a bootable USB drive: Once you have the reimage software downloaded, create a bootable USB drive that you can use to reimage your computer.
Creating a bootable USB drive to reimage your computer is a simple yet important step to take when performing a reimage. For those who may not be familiar with the process, it simply involves downloading the necessary reimage software, transferring the software to a USB drive, and then using the USB drive to reimage your computer. With the right tools and instructions, anyone can easily create a bootable USB drive and successfully reimage their computer.
Disconnect all external devices: Before you start reimage your computer, make sure to disconnect all external devices such as printers, scanners, and USB drives.

Disconnecting all peripheral devices such as printers, scanners, and USB drives is a crucial step when re-imaging your computer, as it ensures that all the data and information stored on those devices is kept safe throughout the process.
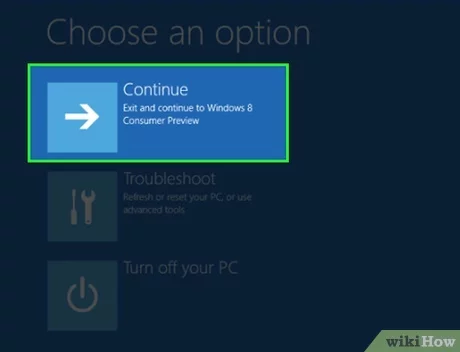
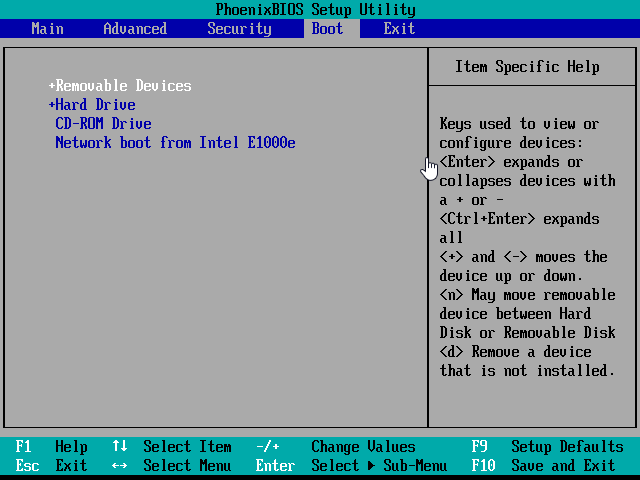
Boot from the USB drive: Once your USB drive is created and all devices are disconnected, restart your computer and boot from the USB drive

Booting from a USB drive is an important step in the process of re-imaging a computer. To begin this process, ensure that all other devices are disconnected from your computer, restart your computer, and select the USB drive as your boot device. Following this step will ensure a successful re-imaging of your computer.
This will start the reimage process.

Reimaging a computer is an important process to initiate in order to restore the system to its original state and eliminate viruses and other malicious software. This blog post outlines the steps to take to start the reimage process, including creating a backup, running a virus scan, and wiping the hard drive.
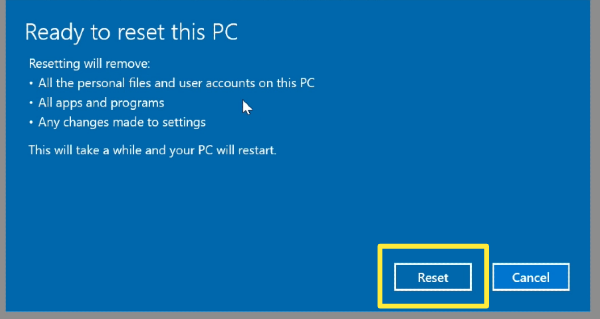
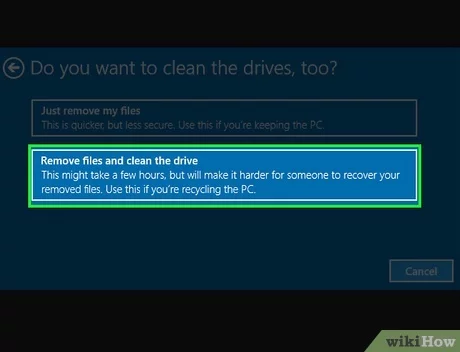
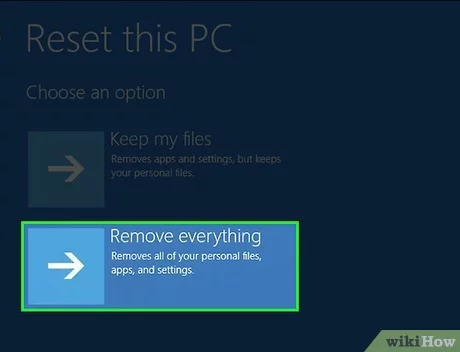
Follow the on-screen instructions: Follow the on-screen instructions to reimage your computer

Following the on-screen instructions is the best way to ensure a successful reimage of your computer and get it back up and running to its original state.
Be sure to read each instruction carefully and follow it exactly.
When re-imaging a computer, it is important to carefully read and follow each step precisely to ensure a successful re-imaging process.
Test your computer
Testing your computer before you reimage it is an important step in the process. It will help you determine whether it is safe to proceed with the reimage, or if there is a hardware issue that needs to be addressed first. Testing your computer includes running a memory test, verifying that all of the hardware drivers are up to date, and checking all the system settings. By taking the time to properly test your computer, you can avoid any potential issues that may arise during the reimage process. Optimized sentence: Making sure to thoroughly test your computer before reimage is essential, as it can help you identify potential hardware issues and avoid any problems during the reimage process.


GIPHY App Key not set. Please check settings