

Reimaging a computer can be a daunting task for even the most tech-savvy user. However, with the right know-how and a few simple steps, you can easily reimage a computer and breathe new life into an aging system. In this article, we will explain what it means to reimage a computer, the steps to do it, and the risks and best practices associated with this process. With our help, you’ll be reimaging computers like a pro in no time!
Back up files
Before beginning the reimage process, it is important to back up all files that are stored on the computer. This can be done by copying the files over to an external hard drive, cloud storage service, or other storage device. Doing this ensures that no data is lost during the reimage process.
Boot from recovery media

When booting from recovery media, it is important to make sure all your files are backed up. This way, in case something goes wrong, you have a way to restore your data.
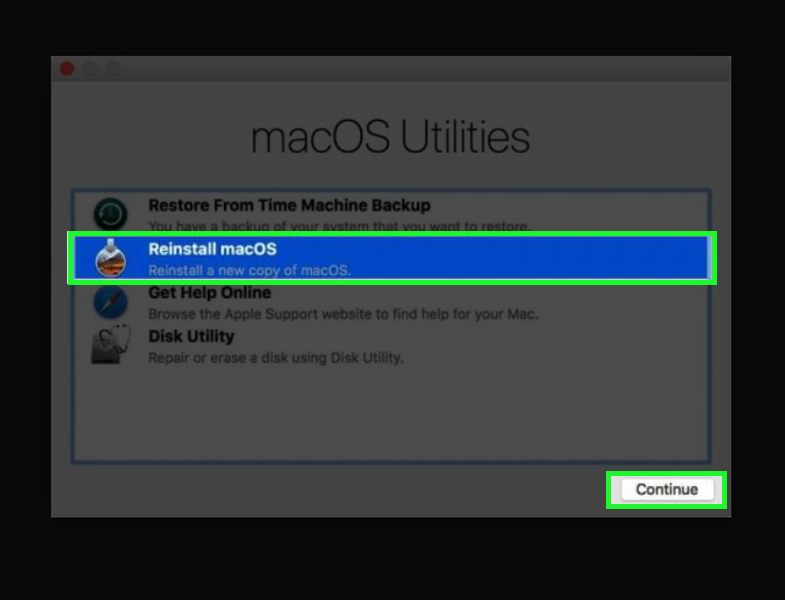
Select reimage option

Once you have selected the reimage option, you will then need to choose the version of the operating system you wish to install. From here, you can customize the settings and begin the reimage process. It is important to read all instructions carefully to ensure a successful reimage.
Choose OS type

When choosing an OS for your computer, make sure to take into account your needs and preferences. Consider factors like the type of hardware you have, the programs and applications you need, and the level of security you require.
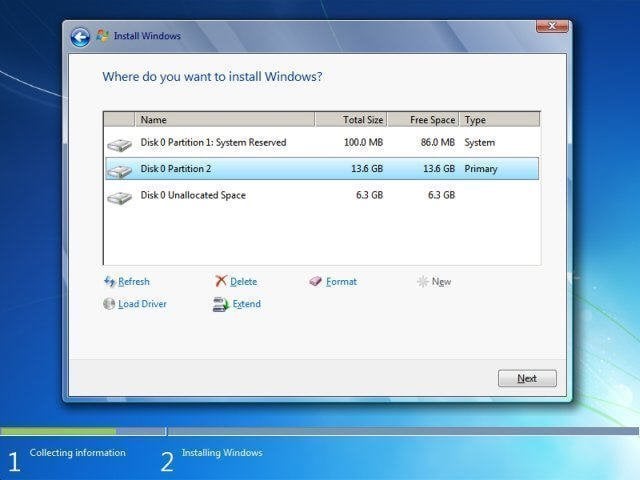
Confirm selections

Once you have selected your image and confirmed the selections, the next step is to begin the reimage process. This will involve following the on-screen instructions and restarting your computer multiple times. Make sure to keep track of the progress to ensure a successful reimage.
Wait for reimage
Once the reimage is complete, it is essential to wait for the system to configure itself and update all of the drivers and software. This process can take some time and it is important to remain patient while the system completes its tasks.


GIPHY App Key not set. Please check settings